Feeling apprehensive about what chemicals are in your soap? Don’t trust store-bought bars anymore? Looking for a more natural alternative? Then you should definitely try making your own soap at home. Not only is it easy, but you can also completely customise both the ingredients and scent to create a bar that’s perfect for you.
How Can You Make Soap at Home?
Truth be told, the art and craft of soap-making isn’t as complicated or time-consuming as you might think. In the past, it was an extremely laborious process that often took days to complete. It involved the use of complex equipment and dangerous chemicals.
Nowadays, however, you can find simple soap making supplies to create beautiful, natural bars in your own home. These kits normally include a base oil, a soap mould, and a fragrance or essential oil of your choice. The base oil is usually a combination of coconut, olive, and palm oils.
To make soap, you simply need to melt the base oil and mix in the essential oil. Then pour it into the mould and allow it to harden. Once it’s set, you can take it out, slice it into bars, and enjoy your very own handcrafted soap.
Soap Making Tips and Tricks
Putting together your soap making supplies is the easy part. The real challenge comes in when you actually start preparing the mixture and pouring it into the mould. If you’ve never made soap before, here are a few tips and tricks to help you get started:
Choose a Recipe and Stick to It
There are countless recipes available online for homemade soap. While it’s tempting to want to try them all, it’s important to stick to just one or two until you get the hang of the process. Once you’re more comfortable, you can experiment with different ingredients and methods.
Some recipes call for the use of lye, which is a caustic chemical. If you’re not comfortable working with lye, there are plenty of recipes that don’t need it. You can also find recipes that use natural exfoliants like oatmeal, coffee grounds, or ground almonds.
Get Everything Ready Before You Start
You need to work quickly when making soap since the mixture hardens as it cools. That’s why it’s important to have all of your ingredients at hand before you start. Measure out the base oil, essential oil, and any other components you’ll be using. Have your mould ready and waiting as well.
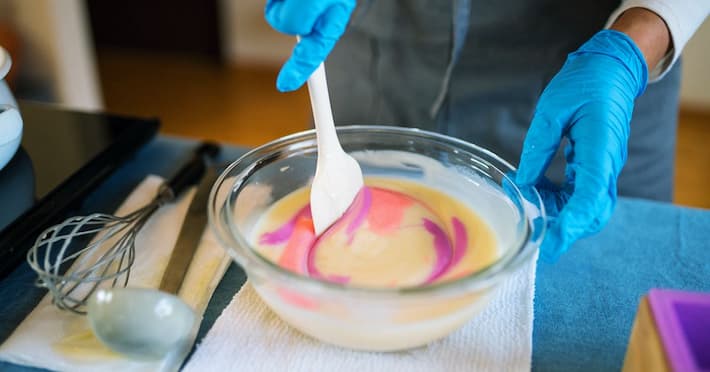
If you’re working with lye, make sure to add it slowly and carefully to the base oil. Lye can cause burns if it comes into contact with your skin, so it’s important to take precautions. Wear gloves and safety goggles, and work in a well-ventilated area.
Pour the Mixture at the Right Temperature
If the mixture is too hot, it can melt your mould. If it’s too cold, it won’t pour evenly and you’ll end up with a lumpy soap bar. The ideal temperature is between 48-54 degrees Celsius.
You can use a candy thermometer to check the temperature of the mixture as you’re pouring it. Or, stick your finger in it—if it feels just warm to the touch, it’s at the perfect temperature.
Let It Cool Down Before You Cutting It
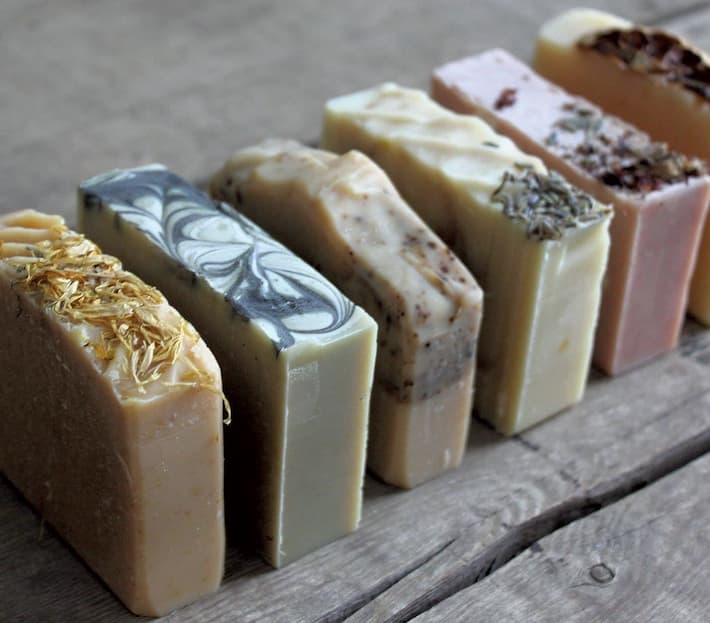
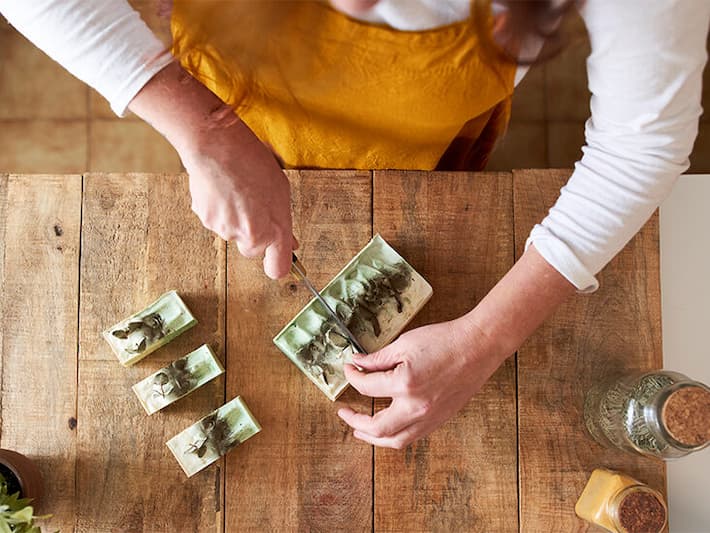
The time required for the soap to cool and harden will depend on the recipe you’re using. In most cases, it will take at least 24 hours. Once it’s cooled, you can remove it from the mould and cut it into bars.
To ensure that your soap cuts cleanly, use a sharp knife or wire cutter. Wetting the blade can also help to prevent sticking. Allow the bars to cure for 4-6 weeks before using them. In this way, they’ll turn out harder and last longer.
Clean Up Carefully
Soap making can be messy, so it’s important to wipe down surfaces and wash your hands thoroughly when you’re finished. Lye can be especially dangerous, so make sure to clean all surfaces that it may have come into contact with.
If you’re using essential oils, be aware that they can cause skin irritation. Even if you’re not allergic to a particular oil, you may still react to it. Washing your hands afterwards is always a good idea.
The containers can be cleaned with regular soap and water. As long as they’re rinsed out well, you can reuse them for future batches and save yourself some money.
Final Thoughts
All in all, making soap at home is a fun and rewarding experience. It’s also a great way to save money since handmade soap typically costs less than store-bought brands.
With a little practice, you’ll be churning out batches of beautiful homemade soap in no time. Just remember to take your time, follow the recipe closely, and be careful when handling the soap making accessories.